Loading...
Implement Google OAuth with NestJS
Introduction
Authentication is a cornerstone of modern web applications, ensuring secure access and enhancing user experience. This blog explores how to integrate Google authentication into a NestJS backend, leveraging Google OAuth2 to allow users to log in with their Google accounts. By the end, we’ll clearly understand how to set up and implement this feature in your application, improving both security and convenience. Let’s get started!
Setup Google Cloud Platform
Head over to the Google Developer Console, sign in using your Google account, and proceed with the following steps:
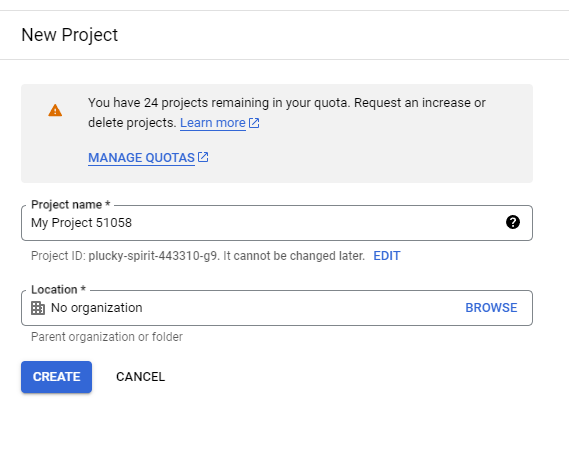
1. Create the project: Give the project name and click Create.
2. Set up the OAuth Application:
With our project set up, navigate to APIs & Services > OAuth consent screen and choose External

OAuth Consent Screen:

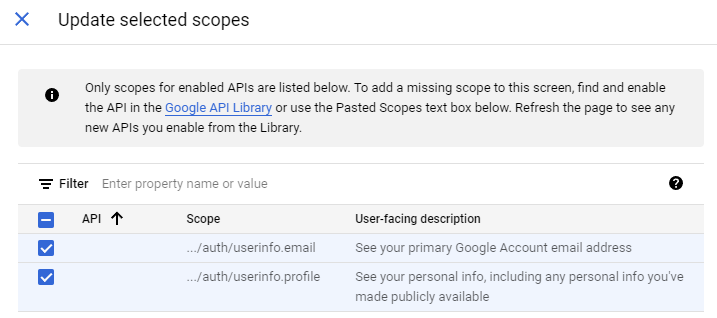
Choose scopes:
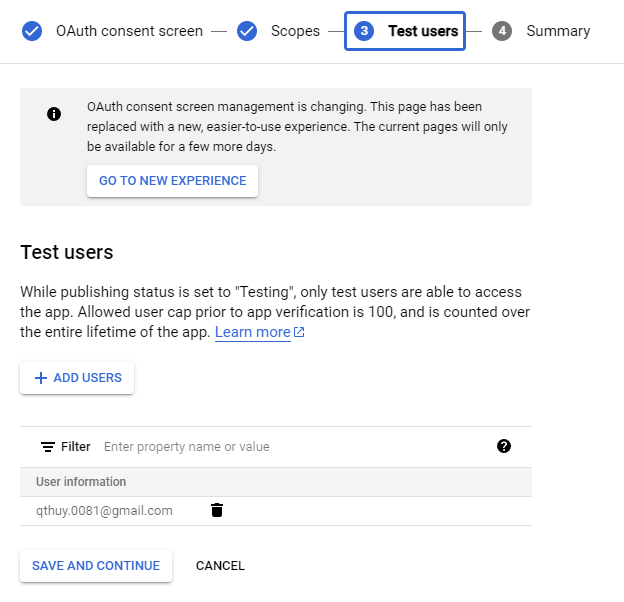
User for testing, here I use my email:
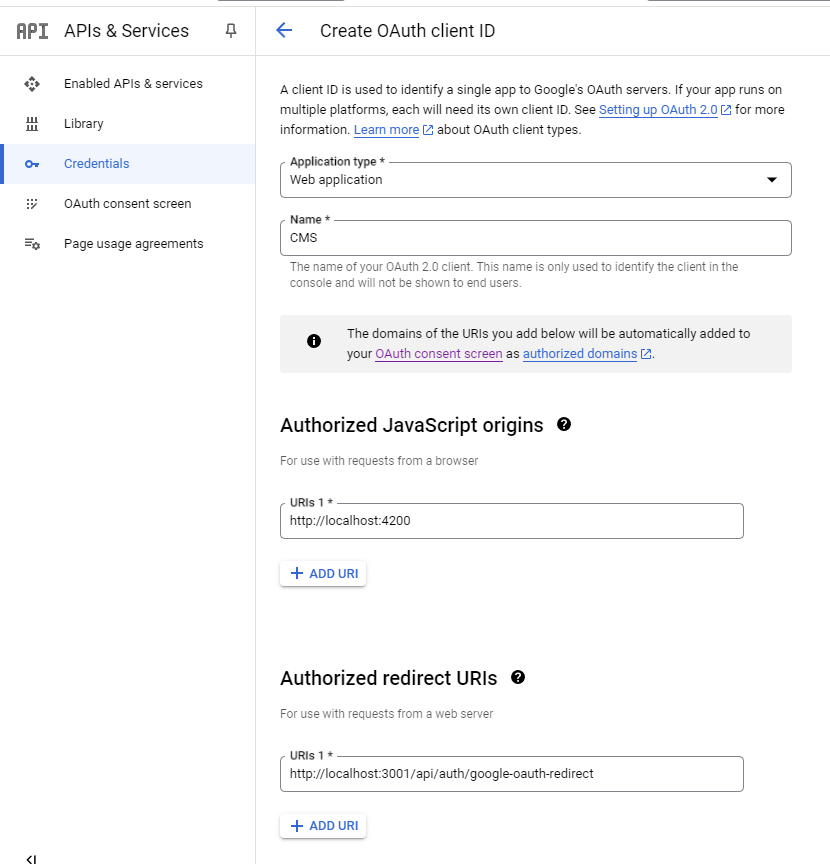
After creating it, go to Credential and create an OAuth Client ID:
Then, click Create to finalize the setup.
With the Google Console project configured, we’re done for now. We’ll return later to retrieve the project credentials.
Implement OAuth Module
Before starting, If you haven't had a Database, you can create a new one by running this docker command:
docker run -d --name mypostgres -p 5432:5432 -e POSTGRES_PASSWORD=mysecretpassword postgres
Therefore I already have a portfolio Nestjs project, you follow the First Steps to create a Nejst project and create an authentication module:
nest g resource auth
To simplify the authentication process, we’ll leverage Passport.js, a popular library for handling authentication:
npm install @nestjs/passport passport passport-google-oauth20 passport-jwt
As mentioned earlier, we’ll revisit our Google Console Project. Head over to Google Developer Console > Credentials > [Your App Name]:

On the right side of the page, you’ll find all the credentials required. Copy them and add them to your .env file in the following format:
GOOGLE_CLIENT_ID=
GOOGLE_CLIENT_SECRET=
GOOGLE_CALLBACK_URL=http://localhost:3001/api/auth/google-oauth-redirect
REDIRECT_URL=http://localhost:4200
Next, declare a new strategy in auth/strategies/google.strategy.ts to handle the Google authentication flow. Here's how you can set it up:
import { PassportStrategy } from '@nestjs/passport';
import { Strategy } from 'passport-google-oauth20';
import { ISecretConfig } from '@config';
import { ConfigService } from '@nestjs/config';
import { Injectable, Logger } from '@nestjs/common';
@Injectable()
export class GoogleStrategy extends PassportStrategy(Strategy, 'google') {
 constructor(private config: ConfigService) {
   super({
     clientID: config.get<ISecretConfig>('secret').googleClientId,
     clientSecret: config.get<ISecretConfig>('secret').googleClientSecret,
     callbackURL: config.get<ISecretConfig>('secret').googleCallbackUrl,
     scope: ['email', 'profile']
   });
 }
 async validate(accessToken: string, refreshToken: string, profile: any) {
   try {
     const { name, emails } = profile;
     const user = {
       email: emails[0].value,
       firstName: name.givenName,
       lastName: name.familyName
     };
     return user;
   } catch (error) {
     Logger.error(error);
     throw error;
   }
 }
}
You should use the NestJs Config to load the .env file. To use this strategy we have to declare it under providers:
@Module({
 imports: [DatabaseModule, JwtModule.register({})],
 controllers: [AuthController],
 providers: [
    ...
   GoogleStrategy
 ]
})
export class AuthModule {}
and to consume the Google Strategy we need a guard:
import { AuthGuard } from '@nestjs/passport';
export class GoogleAuthGuard extends AuthGuard('google') {}
Here’s how the auth.controller.ts file will look after integrating the Google authentication flow:
export class AuthController {
 constructor(
   private authService: AuthService,
   private configService: ConfigService
 ) {}

 @Get('login/google')
 @UseGuards(GoogleAuthGuard)
 async loginWithGoogle() {
   return { msg: 'Login with Google' };
 }

 @Get('google-oauth-redirect')
 @UseGuards(GoogleAuthGuard)
 async googleRedirect(@Req() req: Request, @Res() res: Response) {
   const user = req['user'];
   const token = await this.authService.loginWithGoogle(user);
   res.cookie('refresh_token', token, {
     httpOnly: true,
     sameSite: 'lax'
   });
   return res.redirect(
     this.configService.get<ISecretConfig>('secret').redirectUrl
   );
 }
}
The @Get('login/google') method redirects us to the Google authentication page, where the user can log in. Once the login process is complete, the payload is passed to the @Get('google-oauth-redirect') method. This, in turn, triggers the validate method in our GoogleAuthStrategy, where the user's details are processed.
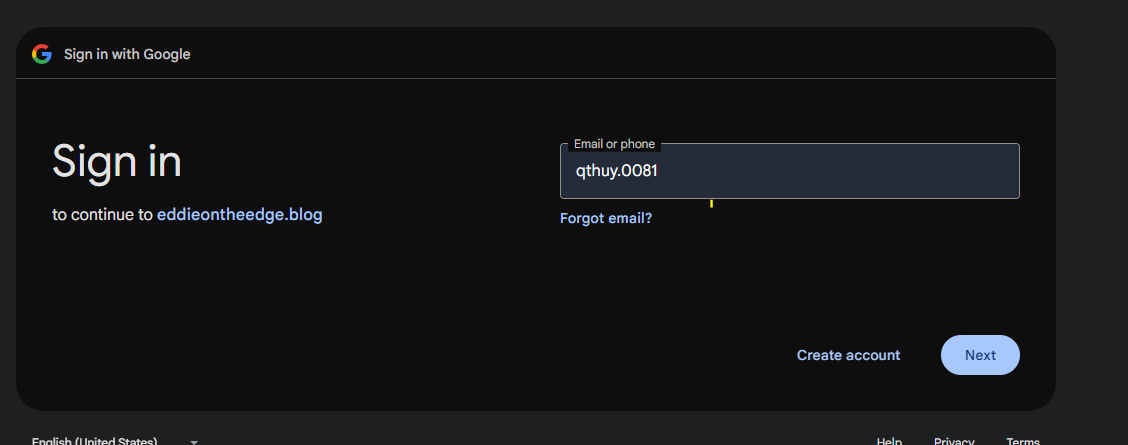
Now let try it:
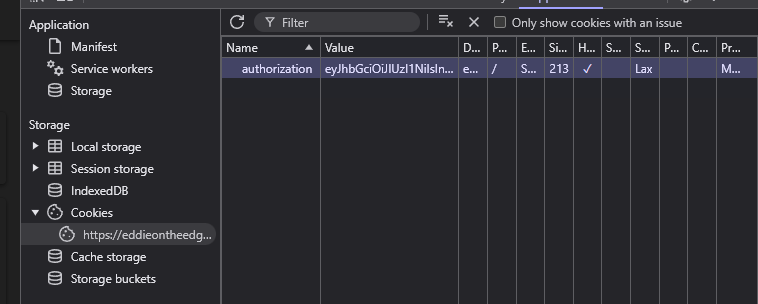
That was all, we’ve successfully integrated the Google OAuth with our BE, congrats!
Conclusion
Integrating Google authentication into a NestJS backend enhances user experience and security by enabling seamless login functionality. By using Passport.js and a custom strategy, we’ve efficiently handled the authentication flow. This setup is now ready to be connected with your frontend application, making your system robust and user-friendly.